Cleanup planner // recorded route
A Mega Man X Regenesis 100% run is easier when you treat the campaign as two passes: clear the stage while learning its language, then return with the right movement and weapon tools. This page tracks confirmed recorded pickups; it does not list every individual chip.
Route console // confirmed pickups
Mega Man X Regenesis 100% Checklist
This checklist covers confirmed recorded pickups; it does not list every individual chip. Mark a row after the game has saved the result.
Progress
0 / 19
Turbine Facility
BlockedRooftop Sub Tank
Sub Tank
Climb to the red building rooftop after you have the extra jump height.
Requires: Double Jump
Turbine Facility
ReadyUppercut capsule
Movement upgrade
Follow the falling blocks left after the bird section and wait for the floating platform.
Requires: 20 chips
Turbine Facility
BlockedLife Up above the wall fans
Life Up
Dash-jump left after the fans, then use a height tool to keep climbing.
Requires: Uppercut or Double Jump
Geothermal Power Plant
BlockedUpper-path Life Up
Life Up
Take the upper path at the mid-stage 1-Up and keep moving around the spike crusher.
Requires: Uppercut or Double Jump
Geothermal Power Plant
ReadyLaser Charge capsule
Weapon upgrade
During the zigzag lava descent, look left for the false wall with gaps and a visible life refill.
Requires: 15 chips
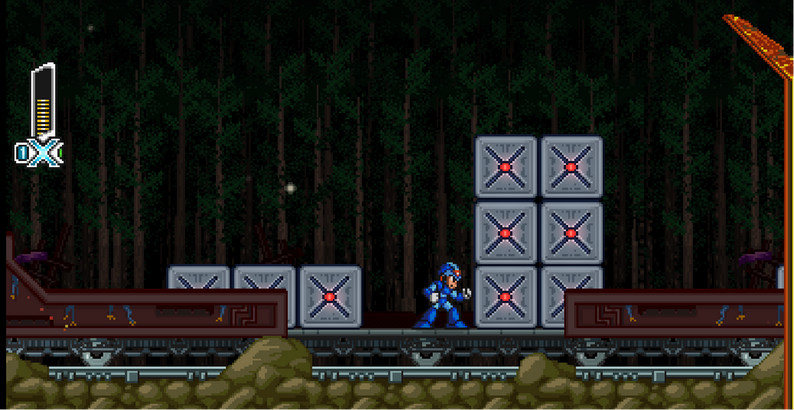
Forest Railway
ReadyTrain-car Life Up
Life Up
After the Ride Armor, climb the car to the right and cross back over the first train group.
Forest Railway
BlockedDouble Jump capsule
Movement upgrade
Return with Flare Burst to break the flammable canisters sealing the capsule.
Requires: Flare Burst · 15 chips
Waterfall Caves
ReadyAir Dash capsule
Movement upgrade
Climb the two green gunboats without sinking them, then continue up-right.
Requires: 15 chips
Waterfall Caves
BlockedSpike-corridor Life Up
Life Up
Leave the second gunboat alive, drop below it, and take the narrow spike corridor.
Requires: Air Dash
Frozen Ruins
ReadyOpening-wall Sub Tank
Sub Tank
Shoot the far-left wall as soon as the stage begins.
Frozen Ruins
BlockedShock Buffer capsule
Armor upgrade
At the Ride Armor, climb the wall above it and dash-jump right instead of entering it.
Requires: Uppercut or Double Jump · 15 chips
Frozen Ruins
BlockedBreakaway-ice Life Up
Life Up
Drop through the left gap after the Ride Armor and use a height tool around the ice platforms.
Requires: Uppercut or Double Jump
Desert Data Center
BlockedWeapon Charge capsule
Weapon upgrade
Break the left rocks in the first indoor section, then use a height tool for the jump.
Requires: Comet Splitter · Uppercut or Double Jump · 15 chips
Desert Data Center
ReadySand-side Life Up
Life Up
After the climbing sand, check left just past the loose ground chip.
Orbital Research Station
BlockedDive Kick capsule
Movement upgrade
Break the three glass tubes before the flamethrower bot, then open the left wall with Cryo Shard.
Requires: Cryo Shard · 15 chips
Orbital Research Station
ReadyRide-Armor roof Life Up
Life Up
In the time-bomb platform room, fly the Ride Armor up through the roof gap.
Orbital Research Station
BlockedCracked-floor Sub Tank
Sub Tank
Break the cracked floor at the bottom-right of the open room.
Requires: Dive Kick
Biomechanical Preserve
ReadyAcid-room Life Up
Life Up
Slide down the right side of the last stair platform in the first acid-drip room.
Biomechanical Preserve
ReadyRapid Shot and Quick Charge capsule
Weapon upgrade
Before the second spider chase, drop into the big gap, stay left, and check the false wall.
Requires: 15 chips
What Counts Toward a Complete Run?
The current route notes treat a full clear as every level completed with the recorded upgrades, Life Ups, Sub Tanks, and secrets collected. The list above is intentionally practical: it turns each known pickup into a revisit decision, shows the stage where it lives, and calls out the weapon or movement option that can unlock it.
The chip requirements are included where they gate a capsule, but this is not a chip-by-chip inventory. Use the game’s own stage progress and results screens as the final authority for your save. Let a cleared stage reach its results screen normally so the level-complete state has a chance to save; choosing Retry is not the same as recording a clear.
A Low-Stress Backtracking Order
Pass 01
Take the ready items
Start with pickups that need no special movement tool: the Frozen Ruins opening-wall Sub Tank, the Desert Data Center sand-side Life Up, and the straightforward stage-room routes.
Pass 02
Unlock movement gates
Return with Uppercut, Double Jump, Air Dash, and Dive Kick when a height check, spike corridor, cracked floor, or sealed capsule is marked Blocked.
Pass 03
Verify the save state
After collecting a late item, finish the room and let the results state settle. Then use Mission Complete as your checkpoint before moving to the next stage.
Useful Collection Habits
- Record the obstacle, not just the item. “Rooftop Sub Tank” is a better return note than a generic marker because it tells you which room idea to look for.
- Keep a save copy before a late secret. Player reports can vary by platform and build, so an exact stage name and a backup save are useful if a results screen behaves unexpectedly.
- Do not force a first-clear collectible. The campaign expects you to sharpen your movement. Leaving a secret behind is often the fastest way to finish the stage and return with a clearer route.
- Use the boss route as a companion page. The right Special Weapon may open a false wall or change a return trip even when the item itself is not inside a boss room.
Late-game secret
Still Missing the Hadouken?
The Hadouken route has its own chip threshold, platform loop, and completion check. Keep it separate from the ordinary pickup sweep so a special-input problem does not make the whole 100% plan feel broken.
Open the Hadouken guide